In this post we are going to discuss about TypeScript development with Visual Studio. We are going to show you how to get started with TypeScript by plugging it into Visual Studio 2013 and how you can create a project from scratch and start developing TypeScript Applications.
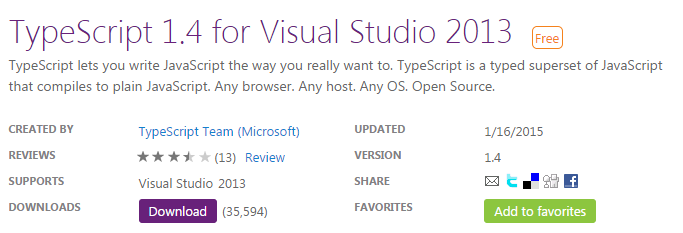
To develop TypeScript Application in Visual Studio you need to install TypeScript 1.4 for Visual Studio 2013 plugin.
According to TypeScript 1.4 for Visual Studio 2013 this is a standalone, power tool release of TypeScript 1.4 for Visual Studio 2013. It includes both the TypeScript experience for Visual Studio and a standalone compiler that integrates with the Visual Studio experience that can be used from the command line. After installing the latest version you will have an option to create a new HTML Application with TypeScript.
After creating the above project ( HTML Application with TypeScript), the solution explorer will look like below :
The app.ts is the TypeScript file, and since it is not going to work on browser we need to get an app.js file which will be created when you will build your project. The contents of app.ts files are :
Visual Studio has the ability to compile this app.ts (Typescript File) to a simple plain app.js (JavaScript File), whenever you save this file. So, see how easy to work with TypeScript in visual Studio, just you need to create a project, save the file and BOOM! you have your JavaScript file which will run on any browser.
Visual Studio will create two files for you app.js and app.js.map. The main purpose of .map file is that it maps the typescript file to the javascript file which will come handy when you need to debug your project. With this file you can actually debug the code which you have written not the code which is generated. The contents of app.js files which is generated are
var Greeter = (function () {
function Greeter(element) {
this.element = element;
this.element.innerHTML += "The time is: ";
this.span = document.createElement('span');
this.element.appendChild(this.span);
this.span.innerText = new Date().toUTCString();
}
Greeter.prototype.start = function () {
var _this = this;
this.timerToken = setInterval(function () { return _this.span.innerHTML = new Date().toUTCString(); }, 500);
};
Greeter.prototype.stop = function () {
clearTimeout(this.timerToken);
};
return Greeter;
})();
window.onload = function () {
var el = document.getElementById('content');
var greeter = new Greeter(el);
greeter.start();
};
//# sourceMappingURL=app.js.map
Please Like and Share the Blog, if you find it interesting and helpful.


Nice post. I have been reading a lot of stuff on this topic in the last few months, but this article stands out with its simplicity & authenticity. Every passage made profound sense. Thanks a lot for this.
ReplyDelete